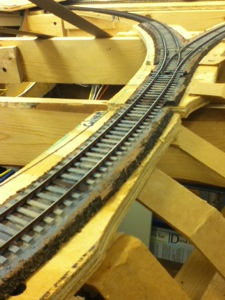
This is another take on ballasting - finer ballast in the center,
rockier stuff outside a little. Per typical narrow-gauge, the center
area does have ballast on top of the ties (actually done to encourage
water to run to the outside, when ballasting with dirt or other
materials). Notice the two tie colors... after review by other
authorities in the house, the tan color will be used for most of the
trackwork going forward.
 |
| So here's a close-up of some actual trackwork. |
| My process:
- Wash the ties with soapy water and a toothbrush (removes the mold
release agents from the plastic ties, for better paint adhesion).
- Paint the ties with grey Gesso (normally used to prime canvas for art
paintings). I've got to paint the visible sides and edges of ties w/
this... rather a pain, but the cost of avoiding fumes from spraying).
- Using a brown Sharpy permanent marker to color the rails. The color
isn't too bad, and provides a coat that darkens the rails and helps the
real color work (later).
- Paint the ties again, with a wash of
grey-tan acyrlic. I'm using Martha Stewart (stop snickering!)
Multi-Surface craft paints; that line has a couple of nice warm greys
and browns.
- Use some other colors and pick up some of the ties, for
variety. I used a second coat of the tan, and a darker brown. I have a
very light tan that's also useful, but that I didn't use here.
- Finally, paint the rails again, this time using a Floquil Rail Brown
paint pen. I couldn't get this to cover properly without first using
the permanent marker, and the brown shows thru a little sometimes, which
looks ok. Still, I needed two coats w/ the pen. The result is what
you see here. Odd-looking now, but should look good w/ ballast added.
|

With the track finally painted, I moved on roughing in the canyon
scenery - basically a deep canyon with both the track and a river
winding through it. Here's the river (see above photo), running into a deep canyon. My
idea here is to intentionally prevent the view from seeing all of the
river, or canyon, at one time.
 |
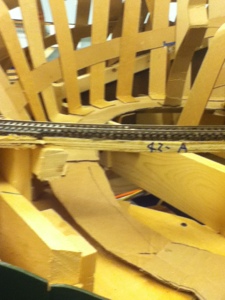
| The river exits under RGS Bridge 42-A. |
Above, this shows the river exiting under RGS Bridge 42-A. There really was a river on
Keystone hill, running out under 42-A, but obviously the topography was
different. I'm after interesting visuals here, not an exact duplication
of the prototype hillside, which would be less interesting in this
greatly compressed space. The river, from this view, will twist right
and out of view behind rock walls (not yet roughed in behind the
bridge).
 |
| So here's a view looking down the track, thru part of the canyon. |
Above is a view looking down the track, thru part of the canyon.
The river is behind and to the right, and bridge 42-A is the center
section, without the painted ties. My idea here is to have a ridge
following along the left side of the river, and crossing the track just
beyond the bridge, forcing the track to go into a narrow cut. I'm
really trying to create the illusion of trackwork threading the terrain,
rather than just having terrain filled in around the track. Beyond the
bridge, the track would pass into a second set of hilly canyons. The
visual here should be looking into the cut to see the track; it'll be
somewhat blocked from side viewing in that small cut.
 |
|
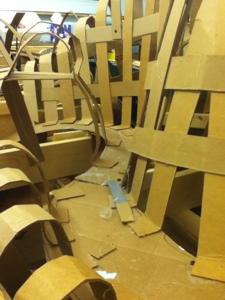
Above is the same section of track, but from the other side. Here, the
river's on the left beyond the cut, and bridge 42-A is at the very top
of the track that's visible here. I'm sticking some of the cardboard
very roughly here - just trying to visualize the overall sight lines and
view blocks. I'm using drywall shims, btw - what you see here is less
than two 50-piece packages - about $8 or so at Menards. And a LOT
easier than cutting all this cardboard! It's really strong too.
 |
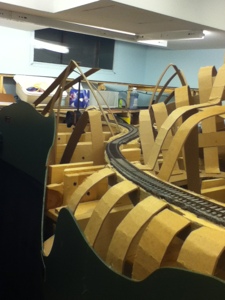
| One last shot - river on the right again |
One last shot - river on the right again. You can see how the river is
descending in a canyon that's getting deeper, with rock walls getting
very steep. The hillside along the track is also gradually getting
steeper, building to the cut beyond the bridge (just visible as the
track curves out of sight to the right in this shot). And again,
although this is only about 10' of track, the curves and view blocks
will - hopefully - make it seem much longer.


