If you haven't checked his site lately, head over to Ragg's...To Riches? website where Joe's got a bunch of RGS-related kits in production (all limited run).
This includes a nice Placerville warehouse in HO, O and S scales.
There's also a couple of mines and a smelter building set (mostly in S scale), the Crested Butte depot (HO and S), and the Durango depot (S scale).
And the huge Rose-Walsh Smelter set in HO.
May 22, 2019
May 19, 2019
Layout night lighting, and op sessions
New layout lighting:
So, I've planned from the beginning to try adding some theatrical lighting to the layout, with the goal being more directional lighting. The existing lighting (and most layout lighting I've seen) provides a classic 'cloudy day' look, but that's a little boring, if functional.Real lighting outdoors has lots more - directional sunlight, blue reflections from the sky overhead, bounce from sunlight off trees, grass, water, etc. I've replicated all of this on stage over the years, when I designing lighting for various productions, and I wondered if it was possible on a layout.
The answer so far... sort of. There isn't nearly the space, power, or equipment to duplicate what I have to work with in most theatres, and the general lighting is bright enough that adding directional light would need more punch that I can easily create - especially without adding a lot of heat.
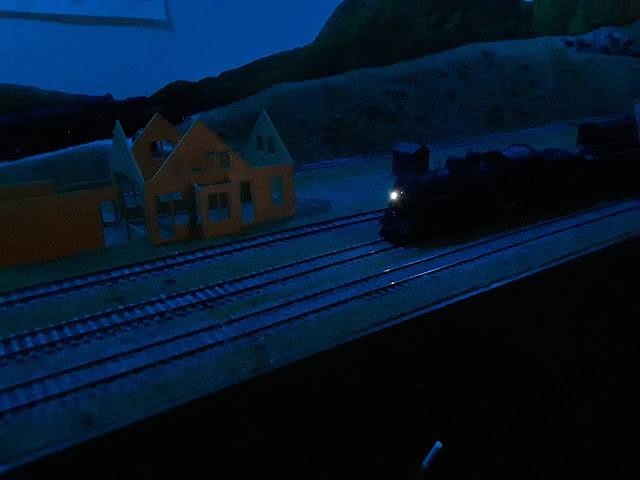
The answer, after some experimenting, was to focus instead on evening or night-time lighting. Here, the levels are lower (ie - I don't need super bright / large / hot lights), and the effects are a little easier. It'll also provide a dramatic change for operators, and allow for some fun with structure lighting.
So, I first installed a bunch of LED blue bulbs (we lighting design types call them 'lamps' usually), into the recessed cans I already had. When I built the room, I kept a couple circuits of these with this purpose in mind, and there's located mostly above and/or behind yards or towns. This creates light, but purposely keeps the front sides of things in shadow.
Here's some cheap bulbs I picked up:
And here's a test shot of what that overhead / backlight approach looks like.
OK, so now how to add directional lighting? Color-changing theatre-level fixtues? Sure! Oh wait - they need a DMX control signal, and probably a small lighting console, plus power and data wiring. And, um, the color quality would need to be excellent, which means Red / Green / Blue / Amber (RGBA) or Red / Green / Blue / Lime / Amber (RGBLA). Those exist, even in the size I need. Something like...
Prices for that quality start around $380. Per fixture. I'd need a dozen at least, 2 dozen maybe. Um, probably not. :-)
I ended up going old-school with some very small PAR fixtures (just 8 for now), and a simple white LED lamp in each. Not real bright, color is good 'ole theatre gel, but cheap enough and practical. At least for trying things.
Here a few shots... quality is marginal, since low-light photos are difficult, and these were just quick test shots with my phone.
More to come on this as I find time to play with this aspect more...
Recent op sessions:
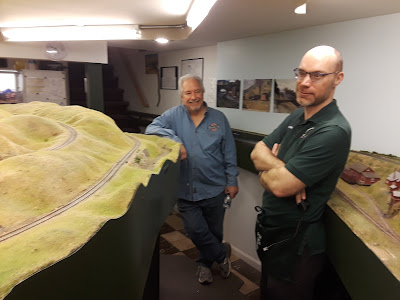
And some shots from recent op sessions!Ridgway Depot - construction begins
Ridgway Depot started:
After being kinda intimidated by this wonderful but complex kit, I finally dove in and began working on the Ridgway depot kit. This was offered by Raggs to Riches, and is now out-of-production.So, here's the workbench, and the beginning of the work.
Here's
my work bench. There's a LOT of windows and trim in this kit, all
wonderfully lasercut. For the brown, I decided to spray a base coat on
all of it, then add a final brush coat to get the color closer. I'm
using a fairly warm brown, Vallejo Flat Earth for this color.
The base is three pieces, with another piece for the floor. Weights are - of course - actual RGS spikes!
The framing for this kit goes together very nicely - an inner layer which interlocks, and then outer detail layers applied to it.
I wanted to add interior lighting, which means I needed at least some basic interior detail. And because the first floor section has a 2nd floor going in, I had to work on that detail now. Some printed pictures from the internet, scaled to about 1.5" high, and some flooring images, did the trick. A couple figues complete everything I think this needs:
And finally, let's see how this looks with the lighting turned on...
Layout improvements - Flooring and phones
It's been a long time since updates, so I'll toss in a few items. Spring(ish) since here in the Midwest we just finished up 5" of snow last weekend, in mid-April! And now it's raining. Like, almost every day. Sigh...
and I got a dark brown color.
A small tip - I found static electrictity a minor issue during the winter after putting the floor in; that was solved by advice from a friend... get some liquid fabric softener which has anti-static included, thin it down 2-1 with water, and just spray the floor. Problem solved!
This had made a huge different, primarily in helping operators coming into and leaving Ridgway, since Vance Junction (next town on the line) is on the opposite side of the basement with a couple small rooms in between.
Here's the control unit (wiring here isn't quite finished...). It just needs power (supplied with the unit), and then I ran a couple CAT5 lines from here to the various phones. You could use any twisted-pair wiring; it's not critical since this is just basic audio signal (no high-speed networking or anything).
If you're looking for how to determine phone wiring, and the colors to use, here's a couple great pages that helped me:
There's some simple programming involved, which let me give each of my 5 phones a one-digit number, so calling between phones is really simple. I even ran a connection into the home landline phone, so I can either pick up or dial out using the regular phone as well (by adding a prefix).
Then it was time to actually install all the phones. I located one in the laundry room, which might someday serve as a dispatcher desk. Then, one at Ridgway, Vance Jct, Dolores and Durango.
Dispatcher phone:
Dolores phone:
Durango yard phone (works for Rico as well):
Vance Jct phone:
As you can see, I also labeled the phones with the other extension numbers, and how to pick up / dial out on the house phone if needed. In the above photo, the label you're seeing was printed on sticky shipping labels, but they didn't adhere well.
After a little more research, I replaced them with some custom-printed vinyl labels, which worked great. I had no idea it was so easy to have these created -pre-cut to the size I wanted, and printed with any text or image I liked. I used this place for that; very low cost too!
Here are links to the phone system, and the phones -
Flooring:
Anyway, a number of updates to the layout Over the holidays I added rubber floor tiles, which make working and standing a lot more comfy. Extra bonus is the floor is warmer in the winter time. The tiles I purchased are these;and I got a dark brown color.
A small tip - I found static electrictity a minor issue during the winter after putting the floor in; that was solved by advice from a friend... get some liquid fabric softener which has anti-static included, thin it down 2-1 with water, and just spray the floor. Problem solved!
Phones:
And, to make communication better I added a small phone system. It took a bit of research, but - again with help and advice from other operators in this area - I found this PABX system, and added a few simple one-line phones.This had made a huge different, primarily in helping operators coming into and leaving Ridgway, since Vance Junction (next town on the line) is on the opposite side of the basement with a couple small rooms in between.
Here's the control unit (wiring here isn't quite finished...). It just needs power (supplied with the unit), and then I ran a couple CAT5 lines from here to the various phones. You could use any twisted-pair wiring; it's not critical since this is just basic audio signal (no high-speed networking or anything).
If you're looking for how to determine phone wiring, and the colors to use, here's a couple great pages that helped me:
There's some simple programming involved, which let me give each of my 5 phones a one-digit number, so calling between phones is really simple. I even ran a connection into the home landline phone, so I can either pick up or dial out using the regular phone as well (by adding a prefix).
Then it was time to actually install all the phones. I located one in the laundry room, which might someday serve as a dispatcher desk. Then, one at Ridgway, Vance Jct, Dolores and Durango.
Dispatcher phone:
Durango yard phone (works for Rico as well):
Vance Jct phone:
As you can see, I also labeled the phones with the other extension numbers, and how to pick up / dial out on the house phone if needed. In the above photo, the label you're seeing was printed on sticky shipping labels, but they didn't adhere well.
After a little more research, I replaced them with some custom-printed vinyl labels, which worked great. I had no idea it was so easy to have these created -pre-cut to the size I wanted, and printed with any text or image I liked. I used this place for that; very low cost too!
Here are links to the phone system, and the phones -
Subscribe to:
Posts (Atom)


