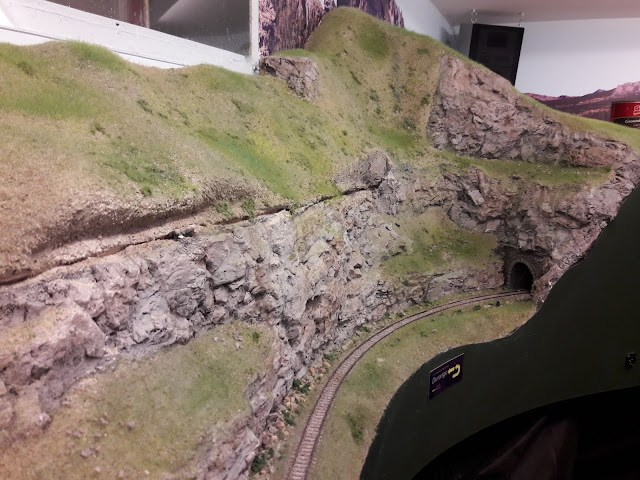
I've finally gotten over my fear of properly using static grass, and have tackled basic ground cover for a significant portion of the layout. My method turned out pretty simple, once I had tried a bunch of things. It's all about layers - of course:
- First, plaster was painted a light tan, matching the soil color of the area (approximately)
- Then, 'traction sand' (from Menards) was sifted into a couple a grades, and the finest grade was sprinkled into the paint while wet (thickly applied paint, especially on the slopes).
- I let that dry, then layered in several colors of ground foam, including some pretty bright fine green, a little tan, and spots of darker fine green.
- This was heavily misted with 'wet' water (water and some alcohol), lthen soaked with diluted white glue (applied out of an old glue container).
- Next was some spots of course medium green ground foam, pressed into the glue (especially on the slopes; it'd fall off without the glue first)
- And finally static grass into the still-wet glue - 2mm dry green, followed by 6mm brighter greens, follwed by touches of 6mm wheat and 2mm dry winter grass. The variation here is key - lusher in valleys, drier in other places. If the glue started to dry out, I hit it with either more wet water, or hairspray.
- By the way, I'm using a home-built static applicator, powered with a 9v battery, and have a nail I just touch into the area for grounding. I use one hand on the nail, the other to shake the grass on - in this way I can move very quickly, moving the nail along as I go. MUCH faster than fastening the nail into the scenery each time.
Then ground foam:
Then grass:
Here's some photos from the Hesperus and Ophir areas:
The road through the town of Ophir is very finely sifted 'pavers sand' (from Home Depot); I like the color. It's just sprinkled into the wet water and diluted glue as described above.
A lot of areas on the RGS along the Ophir high line had large rock talus slopes. I tried to copy that here by using the 'traction sand' again, but a larger size from my sifting activities. Here, I started with a really thick coat of tan paint, and sprinkled the rock into that. I followed it with the finer sifted sand, then finally 'wet' water, diluted glue, and static grass on the flatter bits.
The RGS was not known for a finely crafted roadbed; most of this layout will have pretty ill-maintained track. But even for the RGS, I've got some cleaning on the railheads to do here before trains run again!
So, as I went along 'grassing' the layout, I finally came to Durango and Rico, and decided these really needed photo backdrops. Working again with LARC Products, here's the beginning result in those areas.
This first one is a shot of Sunshine Mountain, peeking behind a gap on the Enterprise Branch scenery
And here's what things look like in Durango. I kept the backdrops here pretty shallow (only 9" tall), mostly to keep the cost down. Hopefully they'll work as distant scenery behind the yard.


